Pottery Tips
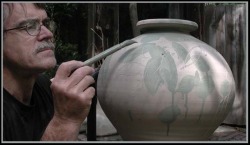
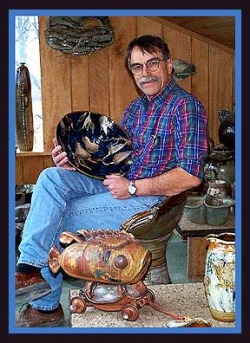
For this highly specialized section we take instruction from Marvin Bartel. We have found it to be great for beginners. We have kept Mr. Bartel's font and color changes.
Find more of his impressive work here
SELF-DUG CLAY VARIATION
If you dig clay yourself, it often has impurities that need to be removed. Most kids love to help with this and there are few better learning experiences. If you are a teacher, invite students to bring in samples for testing. If it works well, ask them to bring more.
PLASTICITY - Some clay is too sandy and some is too sticky. When I prospect I look for clay that can be rolled between my hands into a pencil thick coil of soft clay and wrapped around my finger without cracking. If the coil cracks, it may be too sandy or its clay particles may be too large. Sticky clay tends to be cling to my hands too much. It will often have severe drying shrinkage and tend to crack during drying. Potters often blend several clays to get the right properties.
Commercial clays can be added to balance the mix. Commercial ball clay adds plasticity (so it is less apt to crack when bending it). On the other hand, crude ground fireclay, china clay (kaolin) fine sand, and/or grog reduce plasticity (make it less sticky and shrink less). Do a web search of "ceramic chemicals and clay" for sources of commercially available clay types near you.
IMPURITIES - Most common clay contains impurities, often in the form of iron oxide, sand, roots, and other debris. Troublesome impurities can be removed by making a thin slip. The sand settles to the bottom first. Allow the sand to settle a short time. Then decant the clay water (the good slip from the top down to the sand) and discard the sand in the bottom. Allow the clay (slip) to settle and process it as described in the 9 steps above.
Iron impurities are very common and not easily removed. Iron gives it the reddish brown color when fired and causes the clay to melt more easily. It may not work for stoneware, but most common clays are fine for earthenware.
GOOD USES OF IMPURE CLAY - Potters who make high fire stoneware sometimes add small amounts of impure local clay to their clay body to add character and blemishes. I regularly add some common brick clay to add character to my pottery. Color and iron spots look more natural and give a warmer feeling. Stoneware potters also use local clay as a source of glaze material. These "slip glazes" have been used for thousands of years for lining jugs and traditional crockery.
Outdoor FIRING BASICS top of page
Responsible Adult Supervision is Required
Never leave an outdoor fire unattended
Never fire if there is any chance of a wildfire
Have emergency fire quenching equipment on hand
Leave the site cleaner than you found it
Obey all laws and codes
Clay becomes pottery at temperatures over 1,000 degrees F (the beginning of glowing red heat - about 540 C). Common tribal earthenware is fired to about 1,400 degrees F (760 C). Heat removes the molecular water in the clay. This converts clay to pottery, sculpture, bricks, etc. that do not dissolve in water. Glazed pottery and modern brick is fired in kilns to temperatures ranging from 1,800 F to 2,400 F. Most common clays start to deform and melt if they are fired higher than about 1,900 F. Modern toilets are fired to about 2,400 F.
In tribal settings it is common to use an outdoor bonfire type of firing that is fueled with enough wood kindling under the pottery to exceed red glowing heat during the burn. The stack of pottery is above the wood and the pottery stack is covered with a thick layer of natural material like tall grass, animal dung, etc. to hold the heat in. This insulating layer also burns toward the end of the firing. In many cases this insulation-fuel layer is covered with a thin crust shell. This shell can be made of a clay/sand/straw or grass mixture. One air hole is provided at the top of the mound and several openings are provided around the bottom so the wood burns with enough gusto that the clay gets red hot. The openings around the bottom provide a place to ignite the wood and allow adequate combustion air to enter. The top opening needs to be large enough to allow rapid air flow to enter at the bottom and small enough so the heat is contained. Experiment and learn.
Native clay generally fires to look like common clay flowerpots. Some potters burnish it (rub the nearly dry pieces with a polished stone or back of a spoon). Some Native American potters make beautiful polished black pottery from self-dug clay. Black is achieved by smothering the fire at the end with ashes so that no air reaches the hot pottery and the carbon from remaining fuel blackens the pottery. Typically, tribal pottery is not glazed and is fired without kilns. Sometimes the potters use colored and white clay (slip) to decorate.
Clay that is thick or not dry enough often explodes as moisture turns to steam when it heated rapidly. If this happens, make it thinner, dry it better, heat it slower at first, and/or add something like sand to the clay to open the clay body more and let the steam out.
Find more of his impressive work here
SELF-DUG CLAY VARIATION
If you dig clay yourself, it often has impurities that need to be removed. Most kids love to help with this and there are few better learning experiences. If you are a teacher, invite students to bring in samples for testing. If it works well, ask them to bring more.
- Let the clay become totally dry.
- Slake it as described in 3 above.
- When it is all soft and mushy, stir it until it is a slip. I use a mixer on an electric drill or a blunger. Add water if needed to liquefy it.
- Pour the slip through ordinary window screen available at any building supply store.
- The screening removes stones, roots, and other trash that causes trouble. The chief culprit is limestone. Limestone, like plaster, pieces cause pots to break after firing.
- When the clay has settled and turned to mush, remove extra water from top. Dip water off or siphon it off.
- Spread the mush a few inches thick on clean dry porous surfaces. I use, dry plaster, clean concrete, canvas, denim, etc. Smooth the top to avoid getting small dry pieces on the surface.
- If you want it to dry faster, use a fan and/or set it all on a wire rack to allow air under it.
- When it is nearly dry enough, I make coils as thick as my arm and set them around like big arches (a foot tall) and they are ready to wedge and use in 24 hours or less. This clay can be stored forever in an airtight plastic.
In ancient China, potters stored moist clay in caves for the next generation to improve the plasticity of the clay. If it is to be stored long-term, double wrap it. Double wrapping in plastic bags from the supermarket works. Students can bring in hundreds of these.
notes on digging clay top of page
PLASTICITY - Some clay is too sandy and some is too sticky. When I prospect I look for clay that can be rolled between my hands into a pencil thick coil of soft clay and wrapped around my finger without cracking. If the coil cracks, it may be too sandy or its clay particles may be too large. Sticky clay tends to be cling to my hands too much. It will often have severe drying shrinkage and tend to crack during drying. Potters often blend several clays to get the right properties.
Commercial clays can be added to balance the mix. Commercial ball clay adds plasticity (so it is less apt to crack when bending it). On the other hand, crude ground fireclay, china clay (kaolin) fine sand, and/or grog reduce plasticity (make it less sticky and shrink less). Do a web search of "ceramic chemicals and clay" for sources of commercially available clay types near you.
IMPURITIES - Most common clay contains impurities, often in the form of iron oxide, sand, roots, and other debris. Troublesome impurities can be removed by making a thin slip. The sand settles to the bottom first. Allow the sand to settle a short time. Then decant the clay water (the good slip from the top down to the sand) and discard the sand in the bottom. Allow the clay (slip) to settle and process it as described in the 9 steps above.
Iron impurities are very common and not easily removed. Iron gives it the reddish brown color when fired and causes the clay to melt more easily. It may not work for stoneware, but most common clays are fine for earthenware.
GOOD USES OF IMPURE CLAY - Potters who make high fire stoneware sometimes add small amounts of impure local clay to their clay body to add character and blemishes. I regularly add some common brick clay to add character to my pottery. Color and iron spots look more natural and give a warmer feeling. Stoneware potters also use local clay as a source of glaze material. These "slip glazes" have been used for thousands of years for lining jugs and traditional crockery.
Outdoor FIRING BASICS top of page
Responsible Adult Supervision is Required
Never leave an outdoor fire unattended
Never fire if there is any chance of a wildfire
Have emergency fire quenching equipment on hand
Leave the site cleaner than you found it
Obey all laws and codes
Clay becomes pottery at temperatures over 1,000 degrees F (the beginning of glowing red heat - about 540 C). Common tribal earthenware is fired to about 1,400 degrees F (760 C). Heat removes the molecular water in the clay. This converts clay to pottery, sculpture, bricks, etc. that do not dissolve in water. Glazed pottery and modern brick is fired in kilns to temperatures ranging from 1,800 F to 2,400 F. Most common clays start to deform and melt if they are fired higher than about 1,900 F. Modern toilets are fired to about 2,400 F.
In tribal settings it is common to use an outdoor bonfire type of firing that is fueled with enough wood kindling under the pottery to exceed red glowing heat during the burn. The stack of pottery is above the wood and the pottery stack is covered with a thick layer of natural material like tall grass, animal dung, etc. to hold the heat in. This insulating layer also burns toward the end of the firing. In many cases this insulation-fuel layer is covered with a thin crust shell. This shell can be made of a clay/sand/straw or grass mixture. One air hole is provided at the top of the mound and several openings are provided around the bottom so the wood burns with enough gusto that the clay gets red hot. The openings around the bottom provide a place to ignite the wood and allow adequate combustion air to enter. The top opening needs to be large enough to allow rapid air flow to enter at the bottom and small enough so the heat is contained. Experiment and learn.
Native clay generally fires to look like common clay flowerpots. Some potters burnish it (rub the nearly dry pieces with a polished stone or back of a spoon). Some Native American potters make beautiful polished black pottery from self-dug clay. Black is achieved by smothering the fire at the end with ashes so that no air reaches the hot pottery and the carbon from remaining fuel blackens the pottery. Typically, tribal pottery is not glazed and is fired without kilns. Sometimes the potters use colored and white clay (slip) to decorate.
Clay that is thick or not dry enough often explodes as moisture turns to steam when it heated rapidly. If this happens, make it thinner, dry it better, heat it slower at first, and/or add something like sand to the clay to open the clay body more and let the steam out.